Wednesday, October 7, 2015

The Making of Meteorite Crater

This is a fun activity we did recently with the preschoolers. Prepare for a mess and lay down some cheap plastic tarp ahead of time-- it will save you a lot of trouble with clean up after!

Materials (for 1-2 children, expand as needed)

Large aluminum tray or other similar tray with at least 4 - 5 inch depth
1 lb of flour
1 lb of corn starch
2 cups of cinnamon sugar 
Ruler, card stock, or large spatula (for flattening surface of flour and corn starch)
Balls and rocks of different sizes (e.g. ping pong ball, tennis ball, bouncy ball, large and small rocks with irregular edges)

Preparation

Mix flour and corn starch in advance of activity, then spread evenly in aluminum tray. Use a ruler, pancake spatula, or piece of card stock to flatten the surface of the mixture in the tray.

Spread a thin layer of cinnamon sugar over the flour/starch surface. (Hint: don't use all of it so that you can repeat the experiment a few times.)

Introduction

For preschoolers, keep this part simple. Ask your kids about what they think killed the dinosaurs 65 million years ago. Let them make a few creative guesses. You can then tell the story of a large asteroid out in space, entering Earth’s atmosphere (becoming a meteor), crash landing on Earth (now a meteorite), and kicking up a lot of material into Earth's atmosphere.

This large meteorite landed off the coast of Mexico's Yucatan Peninsula.

How big was it? It was about 6 miles wide and left behind a 12-mile wide crater! (It helps to put this in perspective with where you live. For example, the distance from here to the library, zoo, etc.).

The dust from the crater spread all over the world, and that same dust layer is even visible in the Grand Canyon!

There is another large and well-known meteorite crater right here in Arizona

How big was it? This one was only about 160 feet wide. Put it in perspective with regard to where you are (measure it out with them by pacing or using a measuring tape). This meteor hit the Earth only 50,000 yrs ago.

Just a few years ago, an even smaller meteorite landed in Russia, this time approximately 65 feet wide. It exploded into smaller pieces before it hit the Earth, but was captured on video by several observers. Here's another really neat movie on Youtube:


Some meteorites are much smaller than these that we've talked about— the size of your fist and smaller. They land on Earth all the time!

All of them leave behind clues that they were there, even if you can’t find the meteorite itself. 

Where did the all these big meteorites go when they hit the Earth? Let's do the activity and see if you can figure it out!

Activity

Use different sizes and weights of “meteorites” and drop them (not throwing them) in the flour/corn starch mixture to see what kind of craters they leave behind.
Do any of them create perfectly round craters?
Which ones make the biggest craters?
Which ones throw up the greatest amount of material over the layer of cinnamon sugar?
Where does all the material go that is displaced from the crater?
Which of these of these items more realistically replicates what an actual meteor crater would look like?

Tuesday, July 14, 2015

Bridge Building for a Rainy Day

This is the recent activity I hosted with some preschoolers and school-age children at Catalina Day School. After several recent rainy afternoons during our own summer vacation in Ohio, I had some time to  write down the specifics so I can share it with you. This activity, in itself, is a great rainy-day activity.

Materials:

Red cardboard bricks (the preschool variety; alternatively you can use a pile of books on either side of the bridge)
Dixie cups (1 per child)
Pennies (50 per child)
Construction paper (5 half-sheet strips per child, cut along the length of the paper)
Photos of different types of bridges (arch, suspension, beam, truss, etc.)
5- or 7-inch Lincoln Log block (1 per child, used to keep bricks at standard distance apart)

Introduction:

I like to pose some questions at the beginning:

Have you ever seen a bridge?
What are bridges used for?
Do we have any bridges in Tucson (or wherever you live)?

Bookmark or print some pictures from the Internet of different types of bridges (Arch, Suspension, Beam, Truss, etc.). Feel free to go into as much detail as you feel is appropriate on bridge types, depending on the ages of students doing the activity. A good introductory website for understanding bridge design is:

http://www.pbs.org/wgbh/buildingbig/bridge/basics.html

Activity:

A. Fold the construction paper (for preschool-age and Kindergarten students, fold these sheets ahead of time).
  1. Leave 2 half-sheets unfolded.
  2. Fold 1 sheet accordian style, along length of paper.
  3. Fold the last 2 sheets so that the edge (along the length of each side) is folded up approximately 1 inch on each side (they will look a little like hot-wheel tracks).
B. Arrange the sides of the bridge and the “river."
  1. Place the Lincoln Log between the two cardboard bricks so that it is perpendicular to the bricks. 
  2. The 5- to 7-inch space between bricks now represents where the “river” runs under the bridge.
C. Start testing the bridge designs.
  1. Have students lay one flat half-sheet of paper to span the space between the bricks.
  2. One by one, place pennies in the middle of the bridge. The pennies can represent people or cars. How many people can the bridge support before it collapses?
  3. Remove the pennies and try placing another flat piece directly on top of the first one, so there is a double layer of construction paper spanning the bridge.
  4. How many pennies can the bridge hold this time?
  5. Remove the 2 flat pieces and place 1 of the "hot-wheel-track” pieces (with the folded sides oriented upward) across the river. Place pennies on the bridge, one by one, in the center of the bridge. How many can it hold now?
  6. Remove the pennies and place the other “hot-wheel-track” piece (folded sides oriented downward) on top of the other piece. This will leave a pocket of “blank space” between the two, along the length of the sandwiched pieces.
  7. How many pennies can it hold now?
  8. Remove pennies and bridge. Place the accordion-style bridge across the gap. Add pennies to the center until it collapses.
  9. Which bridge type was most successful?
  10. Now try using a combination of your bridge types to create a maximum-strength bridge that holds a record number of pennies!

Tuesday, March 3, 2015

Foam Marble Tracks

One of my very favorite activities for kids of all ages (adults included) are marble tracks. Recently I discovered a new and less costly material that is perfect for this activity: insulated foam for pipes! You can purchase this in the plumbing section of any home-improvement store. It comes in all sizes but I typically use the 1/2" to 3/4" diameter tubing. (Hint: Bring a marble along with you to make sure it is the right size). While you're there, make sure you grab a roll of Gorilla Tape, as well (usually in the paint section). This tape is great for attaching the track to concrete or other foundation materials.

Materials:

Insulated foam for pipes (as many as you wish to use)

1 roll of Gorilla Tape

Razor blade (with adult supervision)


Procedure:

You'll notice that one side of the foam tubing has a pre-cut slit in it. Go ahead and open up that slit along the full length of the insulation. Use a razor blade to cut open the other side directly opposite of the slit. Now you should have two length-wise, matching pieces.

Lay them end to end and tape them together using the Gorilla Tape. Repeat this with all sections of pipe until you have a nice, long length for your marble track. You can add in a loop or two, ramps, and all kinds of fun tricks. How steep and how long should the slope be to make the marble loop the loop?

Thursday, December 18, 2014

Straw Rockets

I wanted to quickly share a fun activity I did recently with some lower elementary students. My students were really interested rocketry and anything space-related. We talked briefly about the recent landing of a probe on a comet during the European Space Agency's Rosetta mission. To learn more about it, you can visit their web page and see some really amazing photographs!

Then we started our activity with straw rockets. If your kids have good small-motor development, this is an appropriate and worthwhile activity. This was posted by kidsciencechallenge.com. Check it out, try it at home, and see what you think!


Monday, October 27, 2014

Halloween is here again!

Well, it's my favorite time of year again and the perfect time for fun and ghostly science experiments!

One of my favorites that I love to do with the kids is experimentation with dry ice. You can buy dry ice at several local grocery stores. Here in Tucson, it is sold at Fry's and Bashas. Bring a cooler to the store with you to take the ice home if you decide to experiment with it at home. Always wear gloves and use tongs to handle the ice! It is also a good idea to wear a long-sleeve shirt, pants, and socks. It burns if you get even the tiniest piece on you. Remember it is approximately -110 degrees F!

Here is a great video posted by Steve Spangler Science. This is one of the experiments I do with the kids that is lots of fun:


Here is another favorite that blows a giant bubble that the kids love. We also make the carbonated apple juice that he demonstrates in this video:


Enjoy the fun experiments for Halloween!

Thursday, August 28, 2014

Worms, Worms, Everywhere!

I thought I'd share a really fun experience we had last month, learning about composting!


It is so easy to do and such a wonderful, tactile experience, not just for preschoolers but for all ages. I purchased Red Wiggler worms from Uncle Jim's Worm Farm. I've had great experience with them and their worms always survive the trip to my mailbox and compost bin.

Materials for making your own compost bin:

1 large Rubbermaid container with lid (approximately 16 gallons)
1 large bag of peat moss (sphagnum peat moss, 3 cubic feet or less to get you started)
Several recycled newspapers
Spray bottle with water (for misting)
Red Wiggler worms (approximately 1000 - 2000 count)

Instructions (Prepare this ahead of time so that it's ready for when your worms arrive):

  1. Drill a few holes in the lid of the Rubbermaid container so the worms can breath.
  2. Shred newspaper into small strips and place in container.
  3. Add some (or all) of your peat moss to the newspaper, to make a composition of 1/2 peat moss and 1/2 newspaper. It's not an exact science-- just "eye" it to see if it looks like the right mixture to you. Remember, you'll want to leave quite a bit of space in the bin to add compost to it over time.
  4. Use the spray bottle to mist and mix the materials in the bin, until it feels damp like a sponge (but not dripping wet).
  5. Add your worms to the bin, but don't break up their clusters-- the Red Wigglers like to stay together in their little "community." Cover them up with a bit of newspaper and moss mixture and let them go to work!

How to keep your Red Wiggler worms (and compost) healthy:

Here are some things that are GOOD to feed your worms:
  • raw vegetable scraps
  • raw fruit scraps
  • egg shells (no eggs)
  • stale bread (with no butter or other oils on it)
Here are some things that are BAD to feed your worms:
  • any meat product
  • any dairy product
  • oils
  • eggs
  • citrus
  • onions and broccoli (only because they can cause a strong odor in your bin!)

To place food in the bin, lift the cardboard sheet and gently place the food on top of the dirt. Then replace the cardboard. This encourages the worms to come up to the top, grab their food, and aerate the soil. The cardboard helps keep everything moist and dark for them.

Use a spray bottle to moisten the soil and the cardboard sheet on top, once daily or as needed to keep the soil moist (but not wet). The moisture level should be about the same as a moist, squeezed-out sponge.

You shouldn’t need to “mix” the soil up. The worms should do that for you! But feel free to check on them to make sure they’re healthy. They should look moist and shiny. Red Wigglers are not big and fat worms like earthworms, so they won’t be too plump.

Have Fun!


Sunday, June 8, 2014

Pendulum Pandemonium


This Thursday at Catalina we'll be experimenting with pendulums! There are some interesting forces at work that make a pendulum work properly, including Newton's Law of Gravity and his 1st and 2nd Laws of Motion. What happens if you change the mass of the pendulum bob? Will it change the period (one full swing back and forth) of the pendulum? Here is an easy "recipe" for making a pendulum at home:

Materials:

1.5 - 2 feet of yarn or string
pencil
large paperclip
several small washers
tape

Assembly:

1. Tie a small loop at one end of the yarn.
2. Attach the paperclip through the loop, so that it hangs freely from one end of the loop.
3. Make a slip knot at the other end of the yarn. If you don't know how to do this, here are some simple instructions (click here).
4. Loop 1 washer through the paperclip so it hangs freely below the paperclip.
5. Tape a pencil to a table top so that 1 - 2 inches of the pencil hang over the edge.
6. Hang the slip-knot end of the pendulum on the pencil.

Experiment:

1. Try timing how many periods (full swings) the pendulum makes with only 1 washer for 20 seconds.
2. Now try adding washers to the pendulum bob (the paperclip), one at a time, to see if that changes the number of periods during a 20-second interval. Make sure to swing the pendulum bob from the same height as before. Be consistent!
3. Now use the slip knot to change the length of pendulum by shortening it or lengthening it. Swing the pendulum again from the same height. How many periods occur during a 20-second interval this time?

Does the mass of the bob or the length of the pendulum (or both?) change the number of periods?


Thursday, May 8, 2014

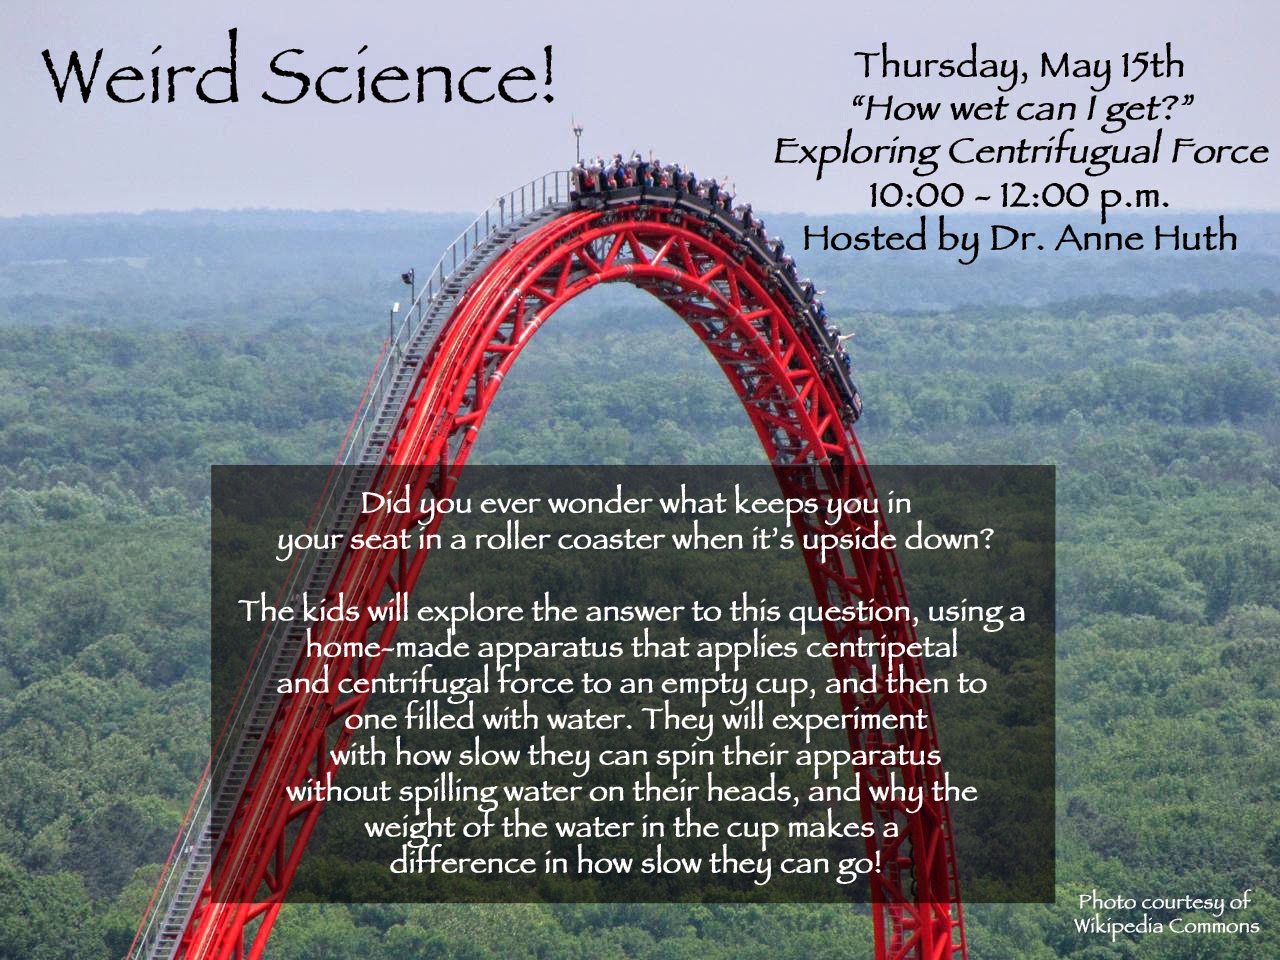
Fun with Centrifugal Force!

This week at Catalina we will be exploring Centrifugal Force. I will soon post instructions on how to make an apparatus to explore this false force at home. Meanwhile I'm looking forward to getting wet on Thursday with the preschoolers!


Wednesday, March 26, 2014

Simple Machines, Part II

This week at Catalina we'll be exploring another Simple Machine! This time we'll test the effectiveness of an inclined plane (one of 6 simple machines) using marbles and tracks. This is an old favorite with my older students, as you may have seen in a previous post about Rube Goldberg machines. For preschoolers, a very simple 5-minute introduction to slope and velocity (i.e. how fast the marble goes) is enough to get them started building their own marble tracks. You'll be surprised at how adept they are at making these.


There is no shortage of materials you can use to build your own marble tracks. Here are some materials you may find at home:

  • hotwheels tracks (these make excellent tracks for any age and are easy to put together)
  • PVC pipe, any diameter or length
  • outer casing of fluorescent light bulb tubes (I found someone at Ace Hardware who dug some up for me, as they're not usually sold on the shelf)
  • wood cove moulding (found at home improvement stores, about $0.70 per linear foot for standard pine)
  • cardboard boxes, building blocks, foam blocks, or cardboard bricks (for propping up the track and creating different slope grades)
If you use wood cove moulding, you can cut these to several different lengths to make it more interesting. Glue two equal-length sides together, side by side, to make a nice concave track for the marble, and that will also sit flat on the bottom. I used regular Elmer's "Glue All" to glue the pieces together and then clamped them together while they dried.

Try these out and have fun!


Wednesday, February 26, 2014

Simple Machines


This week we are building catapults using a simple machine: a lever. Here are the materials you need to make one at home:

yardstick
1 and 1/2" PVC pipe (approx. 3" section)
rubber band (optional)
dixie cup
ping pong ball

The yardstick serves as the "lever" and the PVC pipe serves as the "fulcrum." Place the PVC pipe under one end of the yardstick. String the rubber band through the middle of the PVC pipe, then wrap each end around the end of the yardstick to attach the PVC pipe to it. Then slide it down toward the middle of the yardstick. (You don't really need the rubber band, but its purpose is to help keep the fulcrum in place as you use the lever. Just slide the rubber band with the fulcrum back and forth down the yardstick to adjust the placement of the fulcrum.)

Use a glue gun or strong tape to attach the dixie cup, open side up, to one end of the yardstick. Now the fulcrum (PVC pipe) should be on the underside of the yardstick and the dixie cup should be on the top. This is for holding the ping pong ball.

Now you're ready to play! When you put the ping pong ball in the dixie cup, that is called the "load." Use your hand or foot to push down quickly on the other side of the yardstick (this is called the "effort") and see how far your ping pong ball flies through the air!

Practice placing the fulcrum at different locations along the yardstick to see how that changes the distance your ping pong ball travels. What is the best placement for the fulcrum?

Monday, January 27, 2014

Rube Goldberg Machines at Camden

This Wednesday in Weird Science we will be exploring Momentum! I am bringing back a very popular activity that I've done in the past with the kids. We will break up into 2 - 3 person groups and build marble tracks using different building materials. The students will be challenged to design a marble track that keeps their marble rolling for the longest period of time. Then, we will spend some time engineering the track materials so that all the components (groups) might work together in one large Rube Goldberg machine! If you don't know what a Rube Goldberg machine is, here is a fine example on youtube that the band OK GO used for one of their music videos. Your kids might enjoy this:


Of course, the ones we design won't be nearly this complex, but fun nonetheless!

Monday, January 20, 2014

Pizza-Box Solar Ovens


Pizza-box solar ovens are perfect projects for elementary school kids and older! Next week I'll be making them ahead of time for the preschool group so that they can melt candles inside them and watch the temperature rise as we put them out in the sun. In the past, my solar ovens have reached temperatures around 200 degrees F. They don't get too hot, but hot enough to melt things! I haven't tried cooking anything in them-- I would want the temperature to be at least 350 degrees F for that. So I need to refine the design a bit to reach that goal.

If you are interested in making a pizza-box solar oven, here is a great youtube video that shows you how to do it step by step. Enjoy!

How to Make a Pizza-Box Solar Oven


Thursday, December 5, 2013

Bubblemania!


Well, it's time for one of my favorite activities with my preschooler Weird Scientists! I have the kids make their own bubble wands and have them try out different shapes to see if it "changes" the shape of their bubbles. We also do a time test, comparing bubbles from a day-old solution to one we made on site. Did you know that pipe cleaners can make excellent bubble wands? Another favorite is a long piece of PVC pipe with a cord loop attached to the end. One end of the cord loop slides up and down the PVC pipe. After you dip the cord in the bubble solution, pull it out and carefully slide the one end of the cord up the pipe toward your hand. Swing it gently around in a semi-circle around you to make a giant bubble, then gently slide the cord closed again to close the bubble and release it.

Usually I like to make our bubble recipe with home-grown glycerin from my husband's former biodiesel-brewing days. However, this time I'm using another tried and true recipe that makes wonderful bubbles (especially if you make it a day or two before you want to use it):

Ingredients:

6 cups of distilled water

1 cup corn syrup

2 cups Dawn dish soap

To prepare:

Stir together water and corn syrup.

Add the Dawn dish soap and stir very gently, without making bubbles.


Sunday, September 15, 2013

Henry's Birthday Brew!

Here are some of the fun experiments we did yesterday, inspired by a young Mr. Henry who turned 8 years old. Happy Birthday Henry! These are all experiments you can do at home, with materials straight out of your kitchen (or bathroom) cupboard.

The Famous Mentos Geyser Experiment


Materials:
  • 2-liter of Diet Coke (and other varieties of soda to test out for fun)
  • 1 roll of mint-flavored Mentos (allow approximately 1 roll for each 2-liter bottle)
  • 1 piece of scrap paper

Method:
  • Do this outside!
  • Open the 2-liter bottle and place it somewhere where it won't fall over. Also keep it several feet away from any furniture or other materials that you don't want covered in Diet Coke.
  • Roll up the piece of paper into the shape of a funnel that will allow the Mentos to drop through it, into the 2-liter bottle.
  • Open the Mentos and drop them, all at once, through the funnel into the bottle.
  • Stand back!

Home-made Lava Lamp


Materials:
  • One empty 2-liter bottle leftover from the Mentos Experiment
  • Approximately 10 oz of tap water per 2-liter bottle (less for a smaller bottle; this does not need to be an exact amount. You simply need a layer of water on the bottom of the bottle)
  • Enough vegetable oil to fill the remainder of the volume in the 2-liter bottle (or whatever size bottle you are using), after the water is added.
  • Food coloring
  • Alka Seltzer tablets (at least 2 per 2-liter bottle)
  • Funnel

Methods:
  • Pour the tap water into the 2-liter bottle using the funnel.
  • Tilt the bottle on its side and use a funnel to pour in the vegetable oil, filling it to the top of the bottle (tilting helps prevent too much mixing of the oil and water).
  • Add a few drops of food coloring.
  • Observe where the food coloring goes when you add it to the bottle. 
  • Add 2 tablets of Alka Seltzer to the bottle, and Voila!
  • Feel free to add more tablets of Alka Seltzer to keep the action going whenever you want to!

Fabulous Foam


Materials:
  • 3/4 cup Hydrogen Peroxide (3% is standard; 6% or greater is available at salon stores and works even better!)
  • 2-liter bottle or similar size bottle
  • Approximately 1 tbs of yeast
  • Approximately 3 tbs of warm water
  • Cup for mixing yeast and water
  • Squirt of dish soap
  • Funnel

Methods:
  • It's best to do this in the kitchen sink or outside.
  • Use funnel to pour hydrogen peroxide into 2-liter bottle.
  • Add a squirt of dish soap to bottle.
  • Add a few drops of food coloring.
  • In separate cup, mix yeast and warm water until yeast is dissolved or not lumpy.
  • Add yeast mixture to 2-liter bottle and watch the reaction!
  • Observe the temperature of the bottle as the foam is produced. The yeast is a catalyst and causes the extra oxygen molecule in the hydrogen peroxide to be released as foam (made even more foamy by the dish soap). This is an exothermic reaction (heat is produced); you should feel the heat increase as the reaction occurs!

Frankenstein's Glove


Materials:
  • One latex glove
  • Approximately 1 cup of vinegar
  • A few tablespoons of baking soda (this is an imprecise experiment!)
  • One jar or cup wide enough that the glove will fit over the top securely.

Methods:
  • Pour the vinegar in the jar or cup.
  • Pour the baking soda into the latex glove, filling the fingertips.
  • Secure the glove over the top of the cup.
  • Lift the fingers of the glove so that the baking soda falls out of the fingers into the jar or cup.
  • Watch the glove come alive as carbon dioxide is produced from the reaction between the baking soda (sodium bicarbonate) and the vinegar (acetic acid).

Sunday, April 14, 2013

Weird Science flyer for Camden campus


It's the last Weird Science of the year at the Camden campus. So excited for the Mars Rovers they create!

Wednesday, February 6, 2013

The Final Countdown...

The Sycamore Class has finally finished their science fair project!

We asked the students what they wanted to call their project.
I believe it's aptly named, don't you? 
The school Science Fair will be held on Friday at the River Rd. campus. School judging will take place on Saturday, and then it is on to the Southern Arizona Regional Science and Engineering Fair (SARSEF) to be judged by scientists and engineers throughout the community! This is fantastic exposure for the Sycamore Class students, and it is the 2nd year in a row they've been able to participate. If you have a chance to attend, I highly encourage it so that your student can see their work in a grand space and among the best in the city. SARSEF will be held at the Tucson Convention Center, and the public viewing days are Wednesday, March 13th through Friday, March 15th. For more information on the schedule or other information, please refer to the SARSEF web page.

I can't tell you how proud they are of their own work (and how proud we are of them). Each student contributed significantly to the project and to the poster, and as a group they worked harmoniously like one big, miraculous organism, producing the fruits of their labor for all to see.  Need I say more?